How to add your (sub)domain to Cyso Cloud
Estimated time to read: 3 minutes
In this tutorial, you will learn how to add a domain or subdomain you already own to Cyso Cloud as a DNS zone, so it can be managed from our DNS servers. Cyso Cloud does not register or sell domains, you need to have an existing domain at an external registrar.
A DNS zone can be either a root domain (e.g. example.com) or a subdomain (e.g. test.example.com). Once added, you will have full control over its DNS records through the Cyso Cloud dashboard.
Prerequisites
For this tutorial you will need the following:
- An active Cyso Cloud account
- A domain or subdomain that is active at an external DNS provider (with you in control)
Step 1 - Request to add a zone to your account.
Login to the Cyso Cloud dashboard, go to 'Services' on the left-hand side of the screen, and select 'DNS'. Click on "Request to add domain to DNS".
A window will appear requesting to add your zone to our DNS.
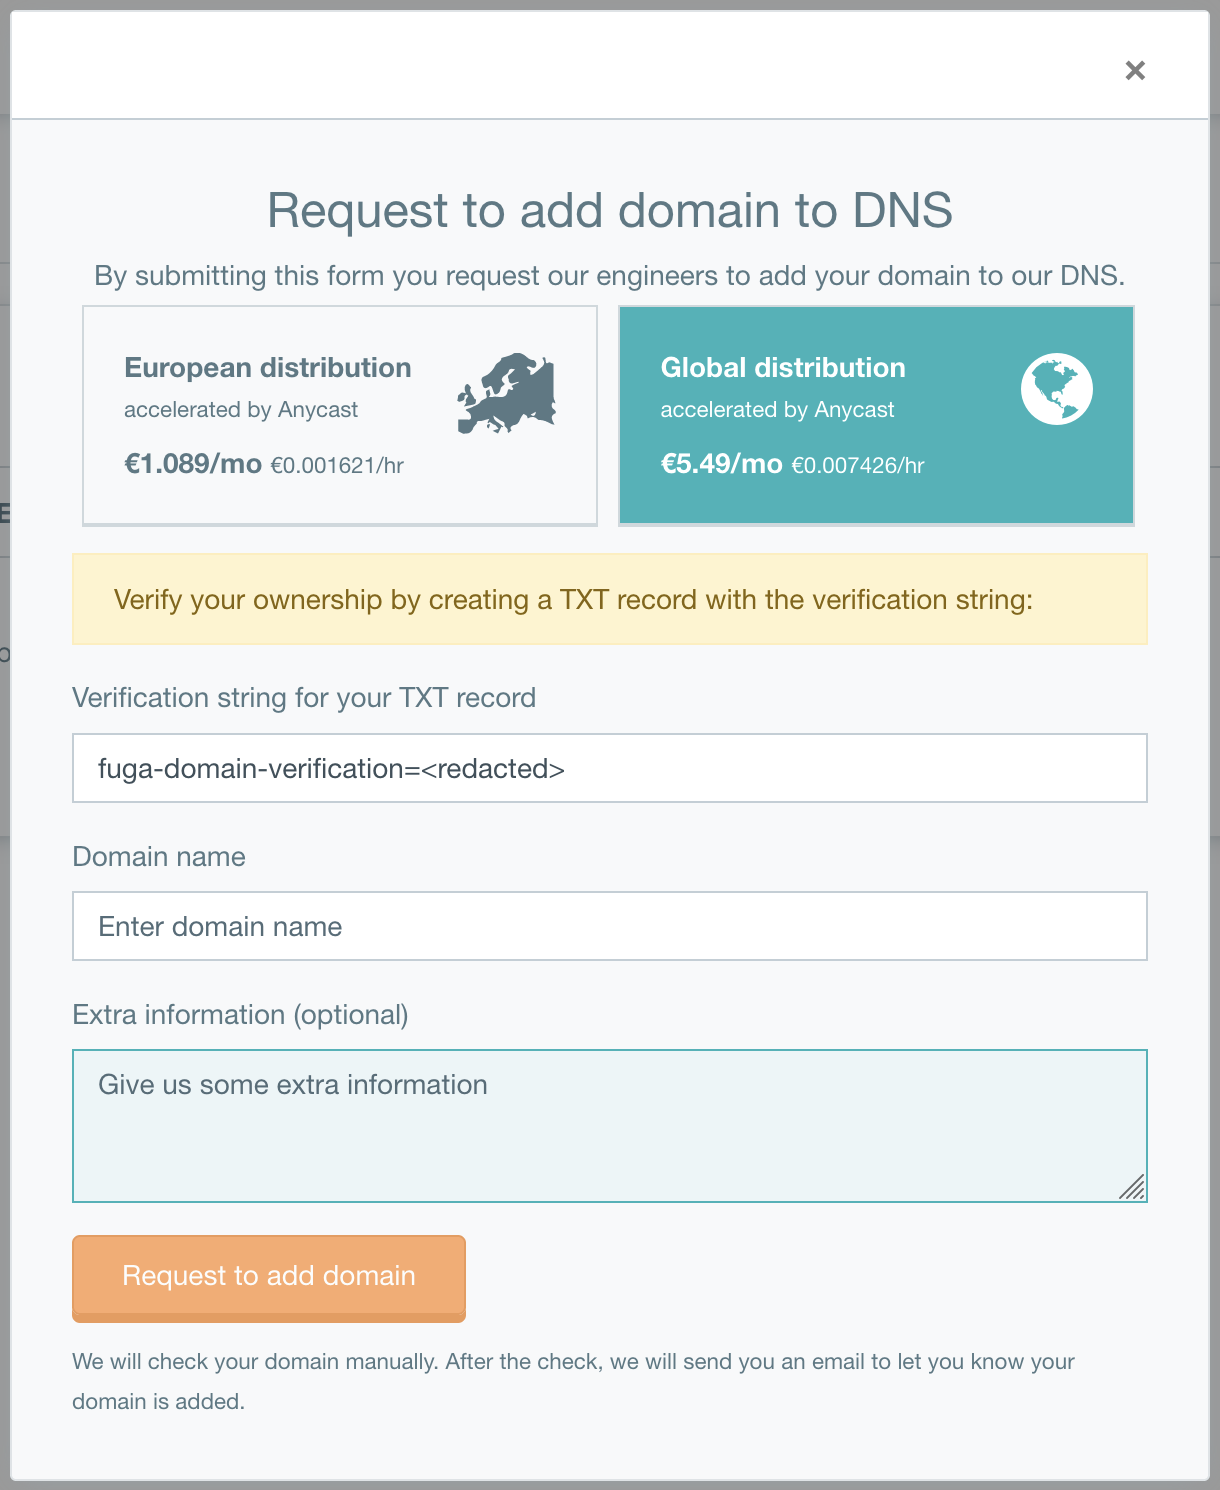
- Copy the verification string.
- Login to your current DNS provider.
- Create a TXT DNS record at the root of the zone you want to add.
- For a root domain (
example.com): create the TXT record onexample.comitself. - For a subdomain (
test.example.com): create the TXT record ontest.example.com.
- For a root domain (
- Copy the verification string into the TXT record.
- Fill in the zone you want to manage at Cyso Cloud (the one where you created the TXT record).
- Add optional information for us in the extra text field.
When entering the information, click "request to add domain". The request can take a day to complete. The zone will be checked manually; you will receive an email when it has been added to our DNS servers.
Wait for us
Wait for our confirmation before continuing with the next step!
Step 2 - Point DNS resolution to Cyso Cloud.
It takes time
Changing nameservers can take some time, depending on your TTL (Time To Live).
Smooth transfer
To make sure your transfer goes as smoothly as possible, create your DNS records in Cyso Cloud first, before making changes at your current provider.
If you already have DNS records under this zone at your old DNS provider, take some time to recreate those records in Cyso Cloud before continuing. How you delegate the zone to our nameservers depends on whether you are adding a root domain or a subdomain:
Root domain (e.g. example.com)
Change the nameservers at your domain registrar or DNS provider to point to our nameservers. This replaces the existing NS records for your domain.
Subdomain zone (e.g. test.example.com)
For a subdomain, you do not change the nameservers of the root domain. Instead, you create NS records for the subdomain at your existing DNS provider (the one that currently manages the parent domain). This delegates only test.example.com to Cyso Cloud, while the rest of the parent domain remains where it is.
For example, at your current DNS provider, add the following NS records for test.example.com:
(Add the third NS record too if you are on the global pool — see below.)
Cyso Cloud nameservers
The nameservers to use depend on your pool:
EU pool:
Global pool (includes a third nameserver):
If you are unsure which pool applies to your account, check your welcome email or contact our support team.
Conclusion
In this tutorial, you have learned how to add a root domain or subdomain as a DNS zone in Cyso Cloud, verify ownership, and delegate DNS resolution by either updating nameservers (for root domains) or adding NS records at your current provider (for subdomains).